Friday, September 4, 2015

Clear Skin?


Hey guys! So I know I've mentioned before that I have really bad acne. It's cleared up somewhat over the years but I still have those really weird skin weeks where your face just gets crazy unmanageable. I know I'm not alone on this. It's easy to get caught up on your own flaws, especially break outs. Everyone gets them, and there's no need to feel embarrassed about it. Don't look at someone else as being "better" or more "pretty" because their skin is more clear than yours. The best thing you can do is find whatever works best for you, no matter the color, the brand, the size, or the price.Everyone is different and everyone's skin is different. My goal in this blog is to introduce to you to products that may be different from what you use, or maybe even something you've never heard of. It's good to be open minded when it comes to cleansing and such because your skin is forever changing, you can't always stick to the same routine. 

Right now I would say my skin is pretty average but I've decided to try something different from my usual cleansing method. At the moment my usual cleansing routine is in more of the drug store budget. On a usual basis, I wouldn't trust less expensive products to work as well for my skin as other not expensive products. Keep in mind I'm a suffering college student and I'm broke as a joke, so I'm not exactly looking for those brand name products that practically set your entire bank account on fire just because you skimmed the idea of purchasing such a product. I'm talking a comfortable kind of pricey. Also because I'm picky, I like to keep it vegan. Once again one of my favorite companies falls into alignment with both my requirements, Arbonne. 
 

Product Introduction: 

1) What Am I Using Now?

 Presently, I am using two different products from the same company:
  • To Remove Makeup Nightly: Night Relaxing All In One Cleansing Wipes from Clean & Clear.
  • To Wash Face Twice Daily: Deep Action Cream Cleanser from Clean & Clear.
Pros:
  • Products work well together.
  •  Leave me oil free.
  • Price
  •  Smells good.
  •  Skin feels clean after use.
  • Removes makeup well.
  • Doesn't dry out skin.
Cons:
  • Doesn't seem to clear up clusters well.
  • Burns some.
  • Not a very intense clean, which I need.

 2) What Am I Switching To?


 Arbonne Clear Advantage Clarifying set. I have used these products before, but I just couldn't keep up the price and I wanted to see what the drug store lines had to offer. I don't believe some brands are worse off than other because of what they look like or what they're priced at. I do however thinks its important to take a look at what goes onto your face and body, and what it is made out of.


Of course, like always I'm super excited that this product is vegan! I love the packaging because it makes it really easy to keep and store the products in its box throughout use.

Pros (First Impression): 
  • Vegan
  • Animal Friendly 
  • Unscented
  • Whole Set
Cons (First Impression):
  •  A little more expensive, but I'm willing to give it a try.


How I Cleanse:

  1. I clean off all my makeup. I don't really trust a wash for this because if you're not careful, you may miss spots of your face when rinsing off. This can cause a lot of buildup and maybe even some breakouts. THAT IS NOT OKAY. Because I had already purchased them, I decided to stick to my Clean & Clear All In One Cleansing Wipes. I use them to clean my eye makeup and eyebrows first, then my face. Then I warm up a wash cloth to super duper hot, ring it out, and once it's cooled until a comfortable heat (Still Hot!) , I place it on my face and let it sit for a few minutes while pushing it into the skin to bring out any blemishes that may be ripe for the picking, if you feel me.
  2.  After I'm done cleaning off all my makeup, I wash my face of really well (In this case using the Clear Advantage Cleanser) by squirting a little of my face wash onto my Beyond Belief Facial Cleansing Brush, and moving out in tiny circles around my whole face and then coming back around a second time really focusing on my trouble areas. 
  3. TONER TIME! I like to use just regular old cotton balls for applying toner because I don't see the point of getting all fancy with it. So I apply my tone one time around my face and then a second time on those gross clusters.
  4. Finally is moisturizer time. I loved that this set came with a moisturizer because it just makes things so much more convenient and I don't have to worry about the products not working well together. Even the moisturizer is medicated, so I just like how a simple product can be so complex and functional to the entire process. PLUS It's super important to moisturize anyways or else your gonna look way older than you are in a few years. That's not cute. Okay? Okay.
  5. AND LASTLY the spot treatment. I've always had a love hate relationship with almost any spot treatment I've used because I love how well most of them work, I just don't appreciate the patchy dryness that's seems to be included with clear skin. BUT ANYWAYS!! I apply my spot treatments with a Q-Tip just so that it I have any remaining dirt out bacteria on my hands it won't get into my already irritated spots. Squeeze just a little on the q-tip and buff it into the blemish to try and message the medicine in.
  6. After all of that, I let it dry and either continue with my makeup routine or go to sleep.... Or maybe I don't sleep. Or maybe I do...
  7. To do my usual morning cleanse, I repeat all the steps except the wash cloth, I try to keep that for whenever I come home to let my skin open and breathe.
 

Summary:


Overall, I think this product change for me may very well become a permanent one. Day by day you can see major changes ( It's hard to tell in the pictures, sorry!) to my skin, and I love that it works so fast. This just goes to show that you get what you pay for. More expensive things are always nice, but when budgeting sometimes makeup and cleansers and skin products can fall pretty low on the priority scale. Looking at what products are made from, especially products that go directly onto your face is important. It's important to use the right things on your skin, not only to have less acne but just to keep yourself healthy. Your face is the first thing someone will look at, so just do everyone and yourself a favor, take care of your skin the right way. I did use this product twice a day, one in the morning once at night. It's okay to use the spot treatment before applying makeup, because it dries completely clear. Make sure you allow time for it to dry fully, or else if you use powder foundation it can get a little caked up in those spots.
Most of my redness is results of scarring, on Monday's ( Even Tuesday ) photo you can see my skin is irritated, and my blemishes are much more "full" than Thursday night's photo. To save time I didn't get a chance to take a picture this morning, but almost all my blemishes are completely gone. Even the ones that began to form last night have dried up. I am one happy camper! Sorry the flash is so harsh!

Where to find the products mentioned: 


#1) Beyond Belief Facial Cleansing Brush - $24.99

I do think that if you don't already have a brush to use with your cleanser, that you should definitely get one. It doesn't have to be all fancy and what not. I know this one is a little pricey, but its a lot better than paying the $99.00+ for Clarisonic. Granted, Clarisonic probably does have a lot better results, but I don't have the cash for that and even if I did, I'm sure keeping my phone on and food in my stomach marks a little higher on the priority scale. And this brush works really good for the price, the replacement heads are not expensive at all. Totally worth it for a trial thing. I bought mine from Sally's but I know they also sell them on Amazon. 

#2) Clear Advantage Clarifying Set - $83.00

  Items are also sold separately, you can find them here.

If you don't already use some kind of cleansing method for your face, I recommend that you start one. It doesn't have to be anything fancy, it's just important for your skin to be clean, and healthy. When you gunk it up with makeup, and lotions, and all that good stuff, your pores can plug up resulting  in crazy breakouts. Nobody wants that. So if you decide to do a wash, you should definitely do it everyday, or every night just to keep your skin clean and while you sleep it can get a break.

 #3) Sea Mud Face and Body Mask - $49.00

Okay, so this one is a bonus. I didn't mention it in this blog entry, but I should have! I love this mask so much, it really feels like it cleans your skin out. I personally like to use it at night (The same time I clean my brushes) and I leave it on until its completely dry. Then next day my skin is so soft and it looks good but also feels really good. This mask is thick and easy to put on. A little goes a long way. It's green and the smell might be a little strong at first but I don't mind it. This is definitely a really good mid-week skin pick me up! I think everyone should have one! MUD MASK FOR EVERYBODY.


#4) Clean & Clear Night Relaxing All-In-One Cleansing Wipes - $5.39

When taking off your makeup, there should be three steps:
 1) Fully remove your makeup using a makeup remover, not soap.  
2) Wash your face with a designated face wash that is beneficial to your skin, not soap.
3) MOISTURIZE BEFORE BED. This is beyond crazy important. BEYOND. Unless you're into looking 80 when you're 20. That's cool too. 
Since I've covered two of the three of these in my product list already, I will now continue to cover the third. PLEASE PLEASE PLEASE PLEASE PLEASE PLEASE DO NOT USE SOAP TO REMOVE YOUR MAKEUP. HAND SOAP IS THE WORST. Especially perfumed soap! Body wash is alright to use on your BODY but not your face! Perfumes and other chemicals WILL give you acne, I can promise you that. You only have one face, so take care of it! Best thing to do is stick with oil free makeup removers. I like these wipes because they're inexpensive, they do the job and them smell isn't bad at all. They're super easy to store because they already come in their own packaging, and you can just throw it away when you're done. PLEASE DO NOT SKIP THIS STEP. Trust me. 

#5)  Clean & Clear Deep Action Cream Cleanser (Oil Free) - $4.94

Although I do appreciate the clean feeling this cleanser leaves, I can't help but like the Clear Advantage cleanser more. I have super oily skin, over night I have breakouts and for that reason I need a strong cleanser that can keep up with my skin. Don't get me wrong, this one feels so good! So if you have dryer skin and don't need to be feeling any dryer this might just work for you. It smells a little weird but not bad, you feel the cleaning right away, and being that it is a cream it makes a super easy super fast cleaning option. Perfect for beginners and experts!


Once again, thank you for taking the time to read my blog! I hope these recommendations are helpful to you and help you in some way! I update this blog every Friday, so don't forget to check weekly!

 If you have any ideas or suggestions you can leave them in my comment box or email them to my business email bethmarieebeauty@gmail.com
Find me on Instagram @bethmariebeauty

Wednesday, August 26, 2015

Mastering The " Cat Eye"

Kitty Cat

The very popular Cat Eye. We all know it, and most of us do it. How do you know you're doing it right? If that is the very question you think of everyday before you put on your eyeliner, you're already doing it wrong. 

First things first, know your Cat Eyes. 

Winged Liner, Or Cat Eye Liner whatever you call it, it's all the same. The most important things to keep in mind while attempting this eyeliner look are these: 
  1.  Wings are a lot like snowflakes. They make look the same, they might come from the same source, but every wing is unique.
  2. There really is no limit to the Cat Eye. It can be as dramatic or subtle as you please. I've found that it's a lot easier to complete a winged look with liquid liner rather than pencil liner because the line can be more precise with a liquid liner. 
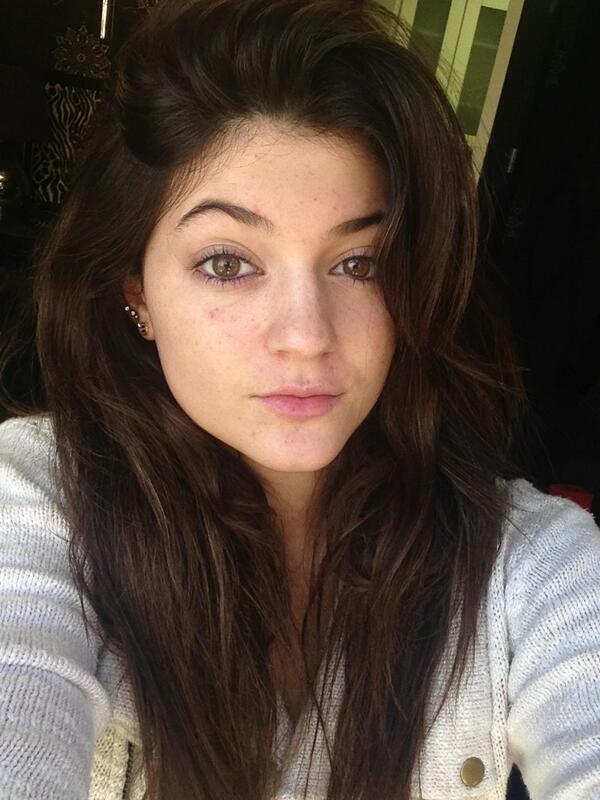
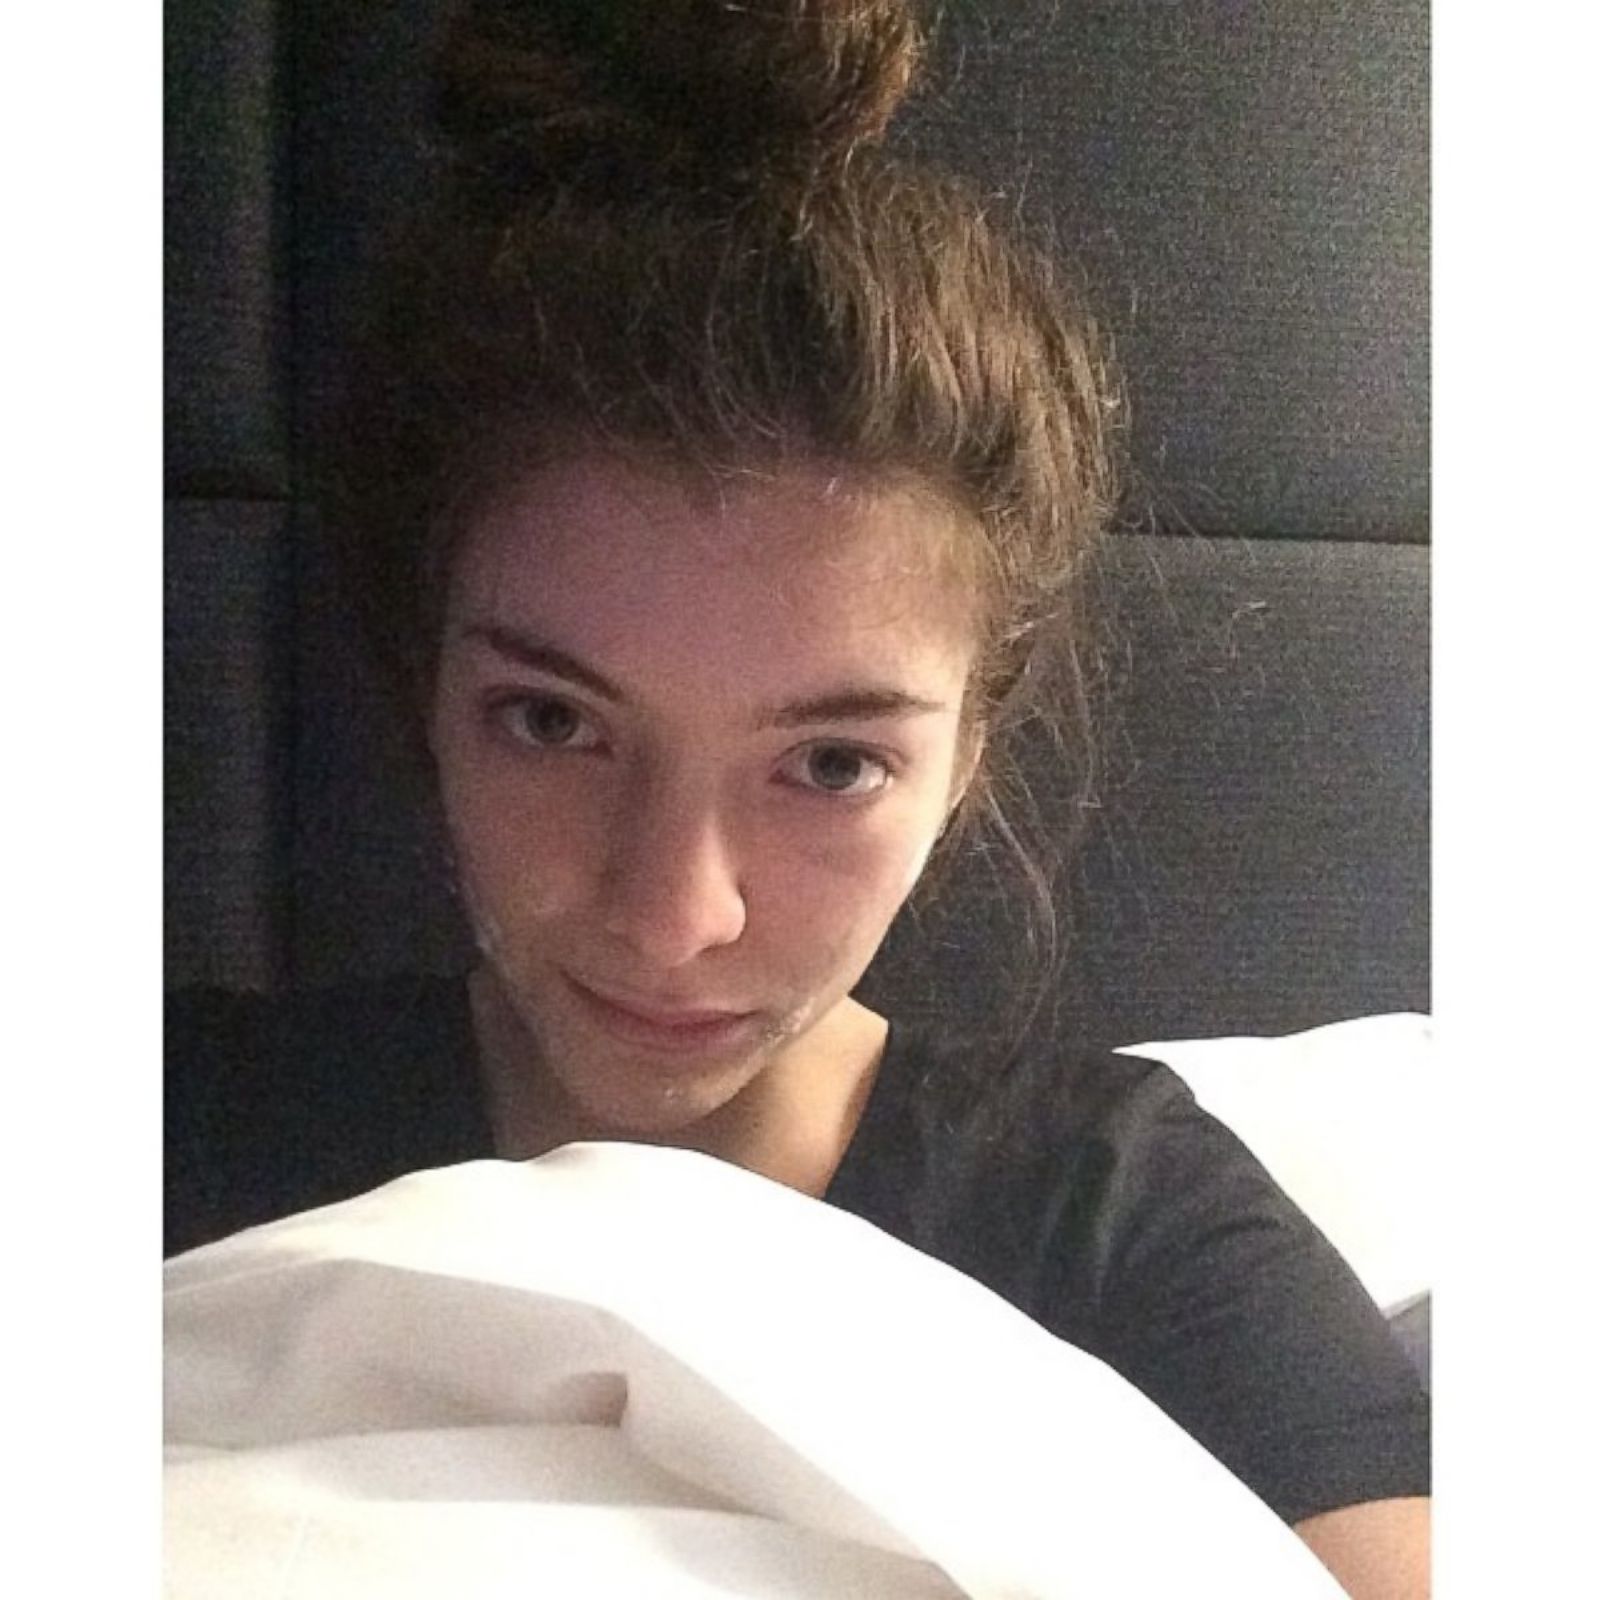
  3. DO NOT LEAVE THE ENDS ROUNDED BECAUSE THAT LOOKS SO BAD AND ALSO YOU MIGHT AS WELL CALL THEM COON EYES BECAUSE GIRL, JUST STOP. STOP. JUST STOP. YOU CANT EVEN ARGUE BECAUSE YOU ALREADY KNOW ITS TRUE. AND IF YOU DON'T, WELL HERE'S EXHIBIT A & B FOR YOUR VIEWING PLEASURE, AND OR DISGUST. 

  Now, Let's Talk Technique:

When creating a cat eye look, it's very important to know which technique you'll be using, and make sure you know it well. Why so intense? Because trust me, if you don't pay attention to each wing, and make them each carefully, your eyeliner will be all over the place.  

The best and probably most easy technique I've found (and personally use) is the scotch tape trick. I know, so basic. But really, when you're in a hurry it makes life that much easier. In case you don't know what this trick is, I'll explain. 

  1. First, and most IMPORTANT: Fill in your eyebrows, (and if you don't feel like doing it, please know you're incredibly wrong and I dislike you). You don't have to go all crazy with it, but if you do this step, it will have you making wings like you've never made wings before. Measuring out your eyebrows will help to set up the tape in the right spot. Personally, I just use my angled brush for with Anastasia Dipbrow Pomade for my brows. Take the brush on the side of your nose (like the picture) and measure out where your beginning, arch, and end of your brow should be. Make it as accurate as possible. Remember, the end of your eyebrow should be the darkest part.
  2.  After your eyebrows are filled in, now it's tape time! DUN DUN DUN!! Take just a little piece of tape ( you don't need the entire roll) and put it on the back of your hand ( Do this so that the tape isn't so sticky and it wont rip off all the foundation work you just did.)  place the tape from the bottom corner of your eye to the end of your brow ( unless you have extremely longer brows, then just place it to where it is exactly diagonal from the outer corner of your eye.)
  3. After the tape is placed, do your lid base & eye-shadow. I like doing it like this because even if your blending gets a little crazy, it will all come off on the tape. 
  4. LINER TIME. I love love love love LOVE the tape idea because as we all know, not all liquid liners are made alike. Some have crazy fat brushes, and some have SUPER skinny brushes. I personally like to do the wing first, I think it sets an ides for how thick I want my upper lid line to be. 
  5. After all that, you're set! Take off the tape really carefully and you're all done!
    Pictorial example of how to use the Tape Method to complete your winged eyeliner look.


The Second Technique that I've only viewed in photos but never actually tried is the spoon trick. Apparently, I'm the only weird one that doesn't have extra spoons hanging out on my vanity, but that's just me. If you guys want me to try it, leave a comment and I can do a pictorial. But I can tell you right now.. I feel like that's the weirdest thing. Okay, and moving on.

  The Third Technique, probably the most obvious technique is just "winging it". Get it? Because it's like I'm saying we'll be spontaneous but we're actually talking about eyeliner. Get it?????
Although  this may be the most convenient, if you're not used to the brush that comes with your eyeliner it can be a total mess. So get familiar!  Whenever I do this, I use a smaller angled brush with some concealer to clean up my wing after I apply the eyeliner. Just to make sure the wing isn't all rounded and junk. Make sure your liner is fully dry before clean up, because some eyeliners will smudge and that can be messy. 

Def My fav, My fav: 


#1. My most favorite beyond all favorite eyeliners absolutely has to be Arbonne's liquid liner in Black. 

Let me tell you why:
1) It's black. 
2) It's vegan. 
3) It's super black. 
Honestly, this is one of my most favorite black liners. The blackest of black I think. And the formula is so easy to put on you'll almost never run out. The only thing I will say about this that the brush is not exactly ideal. I like my wing to have a fine thinner end, and this brush makes it a little tricky. I use a smaller angled brush (Also from Arbonne) and it works amazing! This is one I would definitely use the tape for.
Arbonne Liquid Eye Liner in Black - $25.00 

#2. My Second Favorite is L.A. Colors Liquid Eyeliner (Professional Series *Smudge proof*) in BLACK OF COURSE.

At first I was a little skeptical about this product only because it was in the bargain bin at CVS and I usually don't like to experiment with my eyeliner too much because of two main reasons: Once I find an eyeliner that works, I don't like to trade up. And also, I don't really trust cheap makeup because it doesn't seem to have the same staying power as makeup that costs just a little more. But I bought it anyways, and I'm so glad I did! The brush is literally perfection. It is so thin it makes your wings PERFECT. And when I first opened the bottle it smelled like grapes. Who the heck doesn't love the smell of grapes?! This is one eyeliner that I would recommend again and again. Beginner or not, this will make your life so much easier!!
 L.A. Colors Professional Series in Black - $1.49

#3. Last but not least, NYX liquid liner in BLACK!!! 

Okay so of course NYX always has really good products. When I saw this at ULTA I wasn't sure if I should get it, but on impulse I did because, why not? When I opened it up I was a little disappointed about the brush because what the hell is this. This brush is too long for me. I was upset. But once I started using it I realized my initial reaction was all wrong. With one clean sweep, bam! The wing. I was impressed. Not only did it cut my time in half but like every NYX product, it was perfect. The black is black. The liquid is liquid. It is everything I wanted in a liner. I would also use this with the tape if you're not completely comfortable. 

NYX Vinyl Liner in Black - $7.00

And Finally, my absolute LEAST favorite eyeliner is
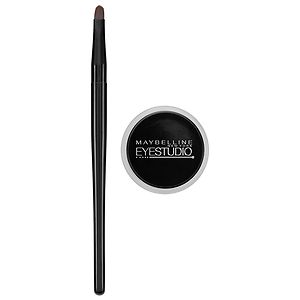
Maybelline's Lasting Drama by Eye Studio Gel Eyeliner,in Blackest Black. 
This was one of the first eyeliners that I ever used. at first, I loved that it came with it's own brush and the color was very vibrant. The one thing I hate hate hated was that no matter how much I put on, or even if I used a finishing spray this eyeliner almost always seems to transfer! The color fades, the formula blends way too much to be a stand alone eyeliner, and the lines transfer all over the top of the eyelid. No thank you. And I hate that. If you decide to use it, YOU HAVE BEEN WARNED. I hope that your experience is a lot better with this product than mine.

Of course, the main thing to remember is that your wings don't have to be perfect, they don't have to be like every other girls, they don't have to be 100% glamour wings every single day. 
If your not comfortable with wings just yet, take a deep breath. You will live. 
These are just a few eyeliners I've tried. These are my favorites, so of course I have to recommend them 100%.
Thanks so much for reading my blog!

Find Me On Instagram @bethmarieyogi
If you have any questions or comments, please feel free to let me know in my comment box!

***I'm also thinking of doing a review on the Kat Von D Tattoo Liquid Foundation I just picked up this weekend! So let me know if you want me to, and even if you don't I probably will. ***


Thursday, August 20, 2015

Unicorn Blood Review

JEFFREE STAR COSMETICS Presents: VELOUR LIQUID LIPSTICK IN UNICORN BLOOD

The first thing I'd like to say before this review gets started is that we all have to appreciate Jeffree Star. You don't have to like him, you don't have to agree with him, and you don't have to listen to his music. But what you must do is thank God every day for Jefree Star's existence and appreciate all the hard work and effort that went along with his Velour Liquid Lipstick line. There's 15 different shades of this liquid lipstick, and I love all of them!!. The colors range from super dark black to nude with all kinds of blue in between.


My most favorite shade off all of these lipsticks (So far because every time I think I'm set on one another shade is released) is Unicorn Blood. Why you ask? Well, I think the color combines dark and feminine. Two things I love for my makeup to do. And guess what else?? VEGAN!!!

Packaging & Presentation:


Usually when I order cosmetics from the internet, presentation is very important to me. With this lipstick, I was impressed. Even the outside UPS box had some stickers which led me to believe whatever was inside had to be good.
Before I opened the box to reveal my new lip color, I tried to keep an open mind. When I finally got it open ( It took me literally five minutes to open the darn thing because the box would not budge!) I was so in love with the inside packaging . Behold, Unicorn Blood. The liquid Lipstick that seemed to be sold out forever was finally all mine.


First Impressions:

My first impression upon appearance? Exactly what I had wanted. The color alone is just beautiful, still in the bottle. The look is super neat and I love that the shape of the lipstick is flat on both sides so it's not one of those that you're afraid might tip over and spill. Unlike some other lip products that I've ordered via internet; for example, NYX (Sorry NYX!) always seems to package their products with a lot of extra room in the box, and really it's like "WHY NYX?!" But not this lipstick. It's packaged in a perfect box that you can either keep or toss. (Personally I like to keep them for storage purposes).

Application:

                                                                   
 When I unscrewed the cap to Unicorn Blood the first thing I noticed right away was that the formula is very runny. That's not always bad with a liquid lipstick, but I usually like my lipstick to promise a little more full coverage. Still trying to keep an open mind, I applied one full layer.
MISTAKE!! This lipstick is not only runny, but so easy to apply it almost makes it difficult. The smell was not too appealing ( a little like sharpies) and when applied straight to the lips it can be a little overwhelming, mostly because the consistency is a lot like paint. It covers a lot very quickly but it dries fast. I so apologize for how crooked my lines came out on my lip! I was not expecting the lip color to be so runny, so it got a little out of control as you can see.

I wasn't too happy with just the one layer. You can see my natural lip right through the very tip top of the lipstick. So, I applied another later just to see what the difference would be.


Finally, Unicorn Blood. The color of fresh blood, my favorite. I love the color even more now than I did when I first put it on. I would say about one coat if you're looking for something darker red but not too "bold", two coats if you're into complete full coverage. Of course, No review is finished without some wear & tear tests.

The Damage:


One characteristic of the box that caught my eye was the "Tip. More like a major warning, Am I right? I decided to test it out. No, not by making out with my oh, so handsome boyfriend. But instead, by making out with bakers. Ever want to debunk some lipstick promises? Eat. And really eat, not how you fake eat in front of your boyfriend to make him think your "skinnier" than you really are by not eating as much as you usually would. So after ripping into my meal for about an hour, I decided to check out the damage.
I was a little disappointed with the outcome. This is Definitely something that would require minor re-application. I drank only through a straw, but I did have a veggie burger which may have caused a lot of the lipstick to come off. This was only with eating, I would NOT recommend making out with an actual human being, the result could be fatal to those lips.

Final Pros, Cons, And Summary:

The Pros-
  • Lipstick Color is exactly as pigmented as Promised.
  • VEGAN!!! As Always.
  • Easy to Apply
  • A little goes a long way.
  • The Price.
The Cons-
  • The Smell. Who wants to smell sharpies on their lips??
  • Sticky even after it dries matte.
  • Re-application is a must.
  • A little messy.
  • Not as thick as I like it to be
Overall Summary-
I waited so long for this lipstick, and I don't think it was a total disappointment. I loved the packaging, everything down to the very last detail. I LOVE LOVE LOVE the color! My pictures don't really do it justice. The red is a very deep burgundy but not brown. It is a very bold color so if  you are lighter skinned it may tend to wash you out a little. I am so in love with this product I am willing to overlook the messiness and the smell. I do think this product is a very good buy. You can never go wrong with Vegan makeup, trust me. I also think that if you're not too familiar with liquid lipstick that this may be easier for you to apply with an additional brush, just so that you don't get too much at one time and overwhelm yourself. Hours later and it is still as pigmented as before. You've got to love a good lipstick.


I give this product about a 7 / 10.
I will be ordering more colors soon, so if you're interested in any that you may want me to do a review on or you have other ideas, please let me know!

Availible Exclusively On Jeffreestarcosmetics.com


Find me on Instagram @bethmarieyogi.

Thank you for reading my blog! If you have any questions or comments, I'd Love to hear back from you!

Wednesday, August 19, 2015

Meet Your Blogger

Hello!

My name is Elizabeth,( but you can call me Beth) and I'll be your blogger for today ( And hopefully more days to come!). I am 19 years of age, I live in bright and sunny Southern California. I'm attending a junior college in the town that I currently live in to get my Associates degree in Art. I'm not sure what "kind" of Art just yet, but Ill get there eventually. 

I am oh, so lucky to live so close to so many cosmetic stores that I love! 
Have I always been in love with makeup? Hell, yes. Have I always picked the perfect shade of foundation and applied all of it flawlessly? Hell, no.
But here I am coming to you now to share my words of wisdom and what I have learned throughout the years of wearing different brands and working out the "kinks" in my appearance.


 A little about my home life first: 

My mother is VERY VERY conservative, and because of that I wasn't "allowed" to wear makeup until I was about 16. But did that stop me? NOPE! I went along and wore makeup at school at 12 and took it off right before I got home. I learned very quickly that without having an appropriate bag to carry my stuff in it became a total hassle. Just a mess.  
 By the time I had reached 16 I already knew what my shade was in foundation, how to apply concealer, what brands to use and what brands to avoid (drugstore wise). I didnt step into an ULTA until I was about 16 1/2 and when I did, Oh lord, there was no stopping this girl. 


Now for the heavy..

I really dislike when women in general talk bad about other women because they don't wear makeup. I feel like those women are the most confident women. Not saying that makeup is bad in any way! I just don't think that because you tend to "hide" your natural face better than others, you're better than those. You're just flawed in other ways. I think we all have a lot to work on ( inside and out) whether the subject is makeup or not. Be kind to each other because when the zombie apocalypse comes, and you're being eaten alive from the inside out, makeup isn't going to save you the way your friends could have.


Now for my ALL TIME FAVORITES!!!


 Because I am Vegetarian ( tend to be more on the vegan side mostly) I do always like to check out cruelty free companies at first look, but I try my hardest not to be bias against any brand of makeup. 

So heres my favorites ranging from 1 -5.


#1 Arbonne-

If you haven't tried it GO TRY IT. Its not a well known brand and it is kind of the pricey side but trust me. Its worth it. I used to break out so bad. (Not kidding, I've had acne since 4th grade. I was a 9 year old pizza face. How embarrassing is that??) After I used Arbonne it never made my skin itchy or feel dry. Because of my acne my favorite product is their CC cream. Its a CC cream Dream. Its a little thick ( so if you're not looking for full coverage I would keep away) but its very blend-able and super build-able. AND IT LASTS FOREVER!! I bought one and it was like 6 months or a little longer before I was out. I literally love it but unfortunately, college has gotten in the way and its been a while since Ive picked this stuff up. It's definitely something to try.  

Available Exclusively At Arbonne.com

#2 NYX -

 NYX is one brand that never ceases to amaze me and they put out so many products that right when I think I'm over the obsession, I'm running back to ULTA for some more. I love so many things about NYX that it's kind of hard to choose. One product of theirs that I am crazy for at the moment is their contour / highlight wonder stick. I know, I know, how basic. But have you used it? It makes contouring in 5 minutes look like contouring that took about an hour without looking crazy dramatic. It's always my go -to quick contour routine and if you ever decide to try I'm sure it will be yours as well. 

Availible at ULTA / CVS

#3 Kat Von D-

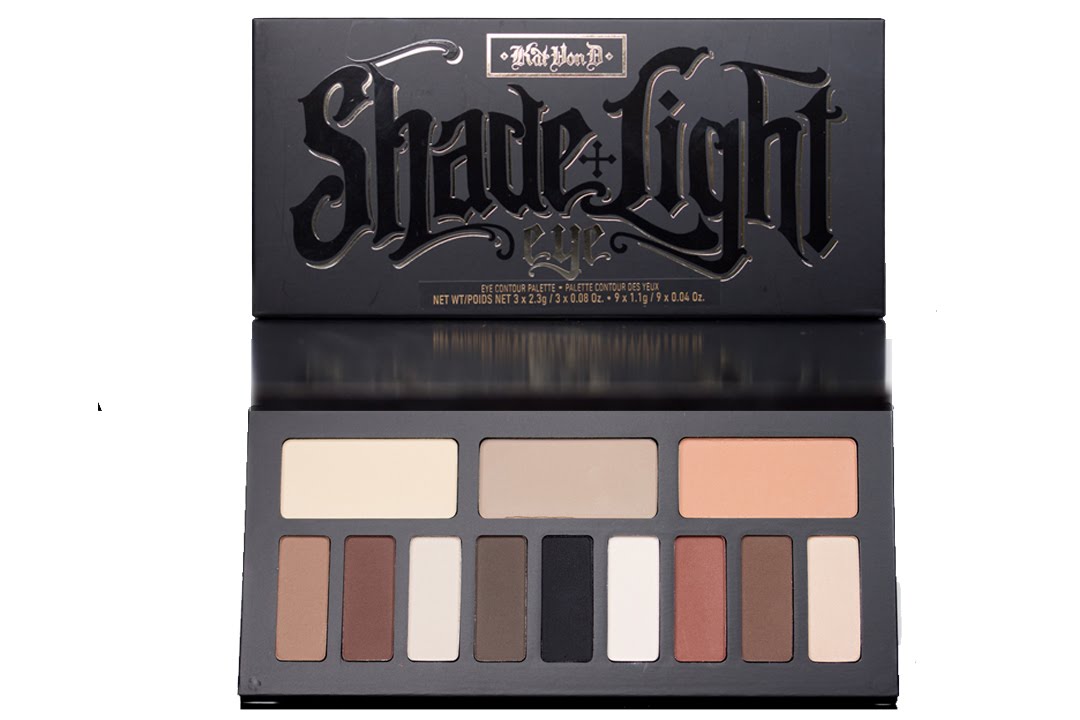
LOVE LOVE LOVE HER. Okay, and I love love love her makeup too. Right now, my latest and greatest Kat Von D obsession is her two newest eye shadow pallets. Monarch & The Shade + Light Eye Contour Pallet. I love both of them so much! The monarch can be bold, yet suddle. And the Shade / Light pallet is just beautiful all the way around. If you don't know what these two pallets look like, here they are:


Beautiful right? There are so many color combos that you can achieve with these pallets so I really don't see how either of them can get old. I personally can't get over them. If you haven't checked them out definitely do so. You wont regret it! 

Available Exclusively at Sephora

#4 Anastasia Beverly Hills-

One too many times have I watched a YouTube makeup tutorial and the Vlogger has failed to either fill in her eyebrows at all or just completely over does them! I think eyebrows are very important. If anything girls, DO YOUR EYEBROWS AND DO THEM RIGHT! Because if whoever you're talking to is like mu-ah, then your eyebrows will be a total convo killer. But they don't have to be! My most favorite eyebrow anything is Anastasia Beverly Hills' Dipbrow Pomade. OMG. OMG. OMFG. This stuff is brilliant. A little goes a long way. I love everything about this, its creamy but not thick, its build-able but never clumpy and it comes in SO MANY SHADES!! I used to shave my eyebrows off for years and now they're grown back in and have some bald spots, but with this you cant even tell my eyebrows have anything on them. Perfectly sculpted, perfectly arched, perfect brows.  

 Avalible at Sephora / Macy's / Nordstrom

  #5 Medusas Makeup -


Medusa's Makeup is so my favorite when it comes to being bold and bright. My favorite product is their loose glitter powder. LOOSE GLITTER. GLITTER. Need I say more? Probably not, but Im going to. Buying glitter is always if-fie because its like "Is this glittery or is this shimmery? Will the glitter stay or is it just going to flake off? How much glitter do i need? WHAT EVEN IS GLITTER??!" 
Let me answer what I can. First off, Glitter is love, Glitter is life. Secondly, if you want a good glitter that you can build on to add to your normal routine without looking "crazy", This glitter is for you. I love it because once again, so many options. I wish I could buy every single one but then I would be broke and that's never good. The really positive thing is that these products are generally cheap and VEGAN!! IF you want it to stay all day you'll need to get a glitter adhesive. I recommend "The Fix" from Medusa's Makeup. It goes on just like any eye primer but it makes your glitter stay stay stay all day. 

Availible Exclusively At MedusasMakeup.com

 I do enjoy many other makeup brands but these are the ones that popped up in my mind right of the bat. I hope I haven't scared you away with my many exclamation points!!! And I also hope these recommendations are helpful to you. Thanks so much for checking out my blog! 

 *Tomorrow I will be posting my review of Jeffree Star's Velour Liquid Lipstick in Unicorn Blood!!*
  
Find me on Instagram @bethmarieyogi

If you have any questions or feedback I'd love to hear from you!